戚風蛋糕胚子(6寸)的做法
對於一些基本上沒有什麼廚藝的人來講, 自己做飯是為難了他們, 很多人想要學習一些家常菜的做法, 戚風蛋糕胚子(6寸)的做法很容易, 即使平時是零基礎, 從不做飯的人, 也可以在學習之後很快就掌握好這道菜的烹調方法。


1、把需要的食材量稱備用。
2、把雞蛋用兩個無油無水的盆分別打在裡面。

3、在蛋黃裡面加牛奶, 糖和玉米油用手動打蛋器打均勻。

4、然後篩入低筋麵粉和泡打粉。

5、攪拌成蛋黃糊。

6、蛋清裡加入檸檬汁。

7、用電動打蛋器打至魚眼泡放糖繼續打。 (糖分三次加進去)

8、打至拿起打蛋器帶出來的蛋白呈直立的尖狀即可。

9、取一半的蛋白糊放入蛋黃糊中, 翻拌均勻。
10、再把剩下的蛋白一起都倒入蛋黃糊中。

11、翻拌均勻即可。

12、倒入模具中,再端起來震兩下。

13、烤箱150度預熱,放下層烤40分鐘左右。

14、有些裂痕不影響的啦!
15、倒扣晾涼。

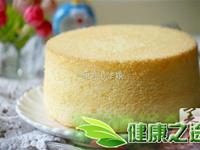
16、晾涼後脫膜,嘿嘿 美美噠哦!
17、成品圖。
戚風蛋糕胚子(6寸)的做法極為簡單,美味又健康,經濟實惠你值得擁有,趕快行動起來吧。
11、翻拌均勻即可。
12、倒入模具中,再端起來震兩下。
13、烤箱150度預熱,放下層烤40分鐘左右。
14、有些裂痕不影響的啦!
15、倒扣晾涼。
16、晾涼後脫膜,嘿嘿 美美噠哦!
17、成品圖。
戚風蛋糕胚子(6寸)的做法極為簡單,美味又健康,經濟實惠你值得擁有,趕快行動起來吧。